

how to find mac address on windows 10
A Windows 10 device, phone, and pretty much anything that connects to a network has a unique identification number known as the media access control (MAC) address embedded on the physical network adapter (Ethernet, Wi-Fi, and Bluetooth), and it's a necessary component, alongside the Internet Protocol (IP) address, to allow communication between devices inside a local network.
Although, for the most part, you never have to worry about this information, sometimes you may need to find out the MAC address of the network adapter, for example, to identify the device or configure networking permissions on a router.
Whatever the reason it might be, Windows 10 includes several ways to determine the hardware address using the Settings app, PowerShell, Command Prompt, Control Panel, and even using System Information.
In this Windows 10 guide, we'll walk you through five different ways to find the MAC address on the network adapters available on your device.
- How to find MAC address using Settings
- How to find MAC address using Control Panel
- How to find MAC address using System Information
- How to find MAC address using Command Prompt
- How to find MAC address using PowerShell
How to find MAC address using Settings
To find the MAC address for a network adapter with Settings, use these steps:
- Open Settings.
- Click on Network & Internet.
- Click on Ethernet or Wi-Fi depending on your network connection.
-
Select the connection.
 Source: Windows Central
 -
Under the "Properties" section, confirm the physical address (MAC) of the device.
 Source: Windows Central


Once you complete the steps, you'll have an understanding of the MAC address for the network adapter installed on your computer.
How to find MAC address using Control Panel
To determine the physical address of a network card on Windows 10 with Control Panel, use these steps:
- Open Control Panel.
- Click on Network and Internet.
-
Click on Network and Sharing Center.
 Source: Windows Central
 -
Click the Change adapter settings from the left pane.
 Source: Windows Central
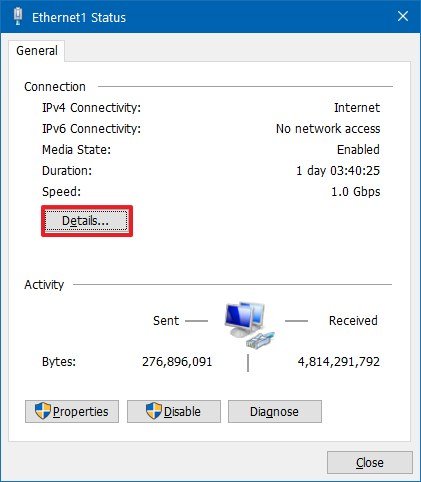
 - Double-click the Ethernet or Wi-Fi adapter depending on your connection.
-
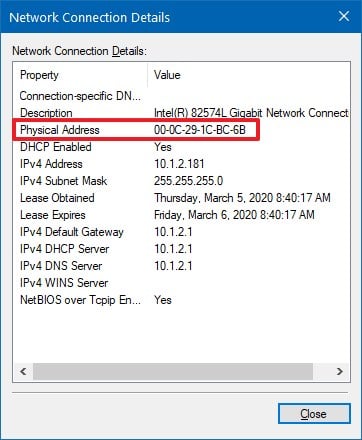
Click the Details button.
 Source: Windows Central
 -
Confirm the MAC address of the network adapter.
 Source: Windows Central


After you complete the steps, you'll know the physical address of the network card, which you can use filter access in the network settings or identify a device on the router.
How to find MAC address using System Information
To view the MAC address without Command Prompt, use these steps:
- Open Start.
- Search for System Information and click the top result to open the app.
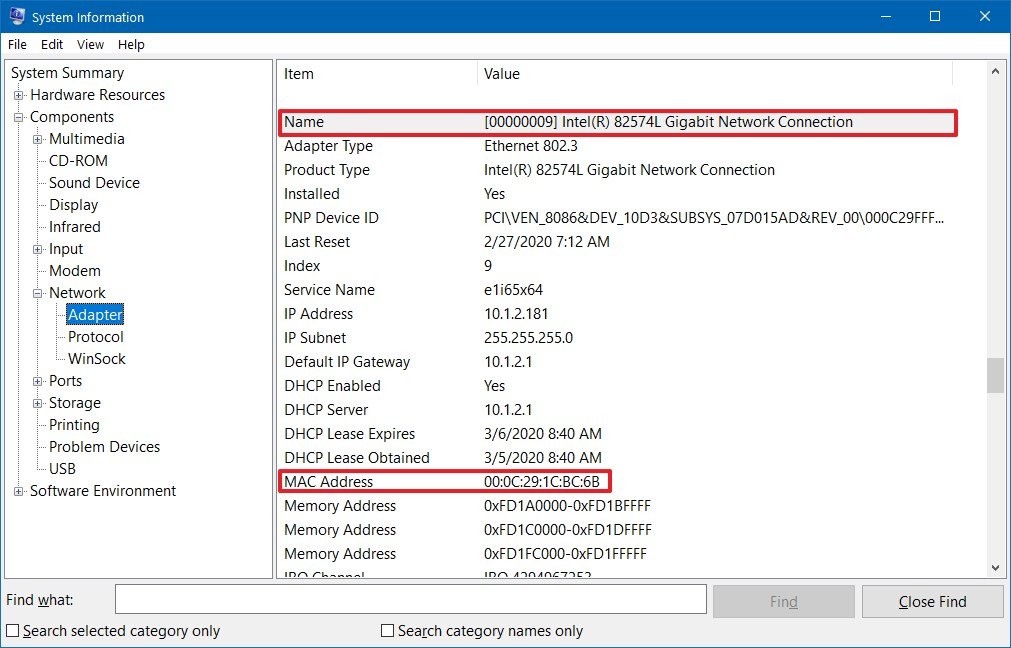
- Expand the Components branch.
- Expand the Network branch.
- Select the Adapter option.
- Scroll down to the network adapter you want.
-
Confirm the PC's MAC address.
 Source: Windows Central

Once you complete the steps, you'll be able to determine the media access control address of the network adapter.
How to find MAC address using Command Prompt
To find the MAC address with Command Prompt on Windows 10, use these steps:
- Open Start.
- Search for Command Prompt and click the top result to open the app.
-
Type the following command to determine the MAC of your computer's network connection and press Enter:
ipconfig /all -
The MAC will be listed in the "Physical Address" field.
 Source: Windows Central
 -
(Optional) Type the following command to check the MAC address of the active network adapters and press Enter:
getmac /v Source: Windows Central
 Quick note: Thanks reader "Tech_Support79" for suggesting the
/vflag to show the MAC information more clearly.


After you complete the steps, Command Prompt will display the hardware address of all the network adapters installed on Windows 10.
How to find MAC address using PowerShell
To find the MAC address with PowerShell, use these steps:
- Open Start.
- Search for PowerShell and click the top result to open the app.
-
Type the following command and press Enter:
Get-NetAdapter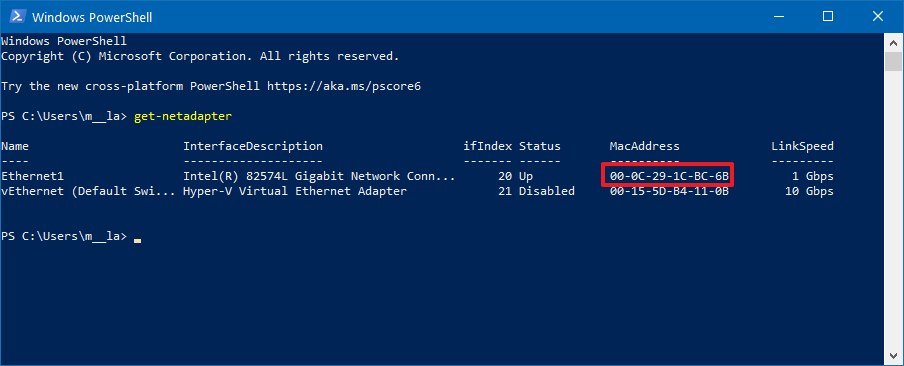 Source: Windows Central
 - Confirm the MAC address of the adapter install on Windows 10.

Once you complete the steps, PowerShell will list the MAC address for every network adapter configured on your Windows 10 device.
More Windows 10 resources
For more helpful articles, coverage, and answers to common questions about Windows 10, visit the following resources:
- Windows 10 on Windows Central – All you need to know
- Windows 10 help, tips, and tricks
- Windows 10 forums on Windows Central

Glorious DDR5 speeds
Review: GeIL's Polaris RGB DDR5 RAM is both rapid and stylish
DDR5 is here, and GeIL already has a few kits available for PC builds. We're looking at the GeIL Polaris RGB SYNC today, which offers speeds of up to 4800 MT/s, which can be boosted to 5200 MT/s with standard overclocking and even higher if you're feeling adventurous.
how to find mac address on windows 10
Source: https://www.windowscentral.com/how-find-your-pcs-mac-address-windows-10
Posted by: cannonsucan1942.blogspot.com
0 Response to "how to find mac address on windows 10"
Post a Comment